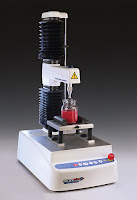
When any Texture Analyser/Materials Testing machine is subjected to a force, the whole system experiences some degree of deflection, including the frame, load cell, probe or grips, couplings, and the sample undergoing measurement.
Steps are taken to reduce this movement as far as possible within the bounds of budget and weight. Reinforcement methods include low flexure structures used in castings (corrugation in extrusions, reinforcement bars or reduced length of cantilever components), linear rails used to prevent torsion, careful choice and installation of load cell, and appropriately tightened internal bolts.
Most Texture Analysers are of the single column type, but a twin column model, TA.HDplusC, is also available, which measures forces to 750kg. The use of two columns significantly reduces frame compliance and expands the available load capacity. This type of instrument comes at higher cost and is bulkier, so is generally only used when the enhanced capacity is required but is a popular choice for univeristies and scientific institutes where the future testing requirements are uncertain thereby requiring a more flexible instrument. Food texture applications generally only require the stiffness and capacity of a single column model, and so this is the setup of choice for most food-specific researchers.
Frame deflection compensation
Deflection is proportional to the load applied through the instrument arm. The Texture Analyser software measures displacement, and this displacement is the sum of the total system deformation. To determine the displacement of the specimen only, machine compliance (deformations associated with the load frame, load cell, and grips) must be removed from this measurement. Frame deflection is specific to each system and is dependent on the forces subjected to a given system.
While this deflection is relatively minor, some operators or applications requiring higher forces may need to correct for it. There is the means to compensate for frame deflection using methods including:
- Single-point correction - uses a calculated force-displacement bend gradient. Non-linearities are not removed but this is still an improvement
- Multi-point bend correction - several thousand points of force-bend data plotted across an appropriate force range. This method accounts for any non-linearity that may be present with particular probe configurations, but to maintain accuracy, must be calibrated more frequently.
 |
| A schematic representation of a force-displacement graph before and after frame deflection compensation |
Why not request a Features and Safety poster for placement near your instrument to inform users:
Or if you have lost it, request a 167 page (pdf) in-depth manual to be sent to you.
There is a Texture Analysis test for virtually any physical property. Contact Stable Micro Systems today to learn more about our full range of solutions.
For more information on how to measure texture, please visit the Texture Analysis Properties section on our website.
The TA.XTplusC Texture Analyser is part of a family of texture analysis instruments and equipment from Stable Micro Systems. An extensive portfolio of specialist attachments is available to measure and analyse the textural properties of a huge range of food products. Our technical experts can also custom design instrument fixtures according to individual specifications.
No-one understands texture analysis like we do!
Get in touch to discuss your specific test requirements
 |  |  |


No comments:
Post a Comment