 The
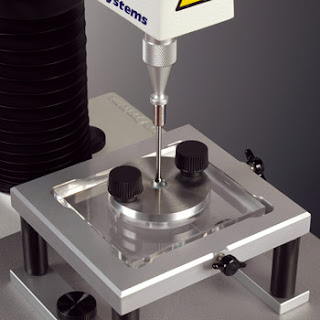
use of the Film Support Rig can provide a very useful test for
monitoring the quality of irregular objects, such as the toughness of
sliced meat. However, this test setup can also provide more fundamental
stress-strain data if the sample has a known uniform thickness and
homogeneous structure.
The
use of the Film Support Rig can provide a very useful test for
monitoring the quality of irregular objects, such as the toughness of
sliced meat. However, this test setup can also provide more fundamental
stress-strain data if the sample has a known uniform thickness and
homogeneous structure.Sometimes the properties of a thin film are under investigation, but the film might be unsuitable for any other type of testing. An example would be a film of dried nail polish; depending on its properties, this can be too brittle to clamp in tensile grips, it is too thin to test under compression and it may not be large enough for bend testing. In cases such as this, the Film Support Rig is ideal, as the sample is clamped at the edges and put under “biaxial tension” by a spherical probe pushing into the centre.
In practice, this means that the whole film is stretched from the clamped edge towards the ball probe. The results are very repeatable providing the probe is centralised in the support aperture, and the film’s thickness is measured as accurately as possible. This may require the use of callipers at several locations across the film’s surface.
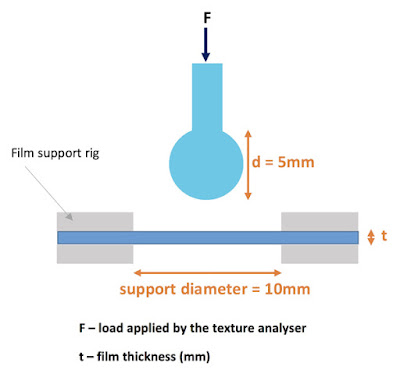
The analysis method outlined here calculates several useful parameters from a film puncture load displacement graph. The experimental setup is shown in the following diagram:
The rig is already loaded into Exponent with its relevant dimensions, and so a macro can be written to take the ball and support diameter and use them in any dependent calculations. The film thickness must be measured in mm.
During a test, the loading arm moves down at a constant speed, pushing the probe into the sample until it reaches a set distance, breaking through the sample. The force-distance graph is heavily influenced by several mechanical properties. Different samples will give different load-distance responses – stiffer samples show a steeper loading line and stronger samples show a greater force needed to break through the sample. The main measurements that can be made during this test are toughness, strength, failure strength and stiffness.
This force-displacement graph along with the experimental geometry can be converted into stress and strain results using the following equations:
Once plotted as axes of stress against strain using the Generate Curve macro command, these in turn can be used to find several important parameters:
A macro is already built into the Quick Calculations menu in Exponent to automatically generate the Stress and Strain axes in units of MPa and ‘no units’.
As this test is generally used for polymers, the stiffness is calculated between 50% and 100% of the breaking force – unlike metals and ceramics, polymers generally become stiffer with increasing strain when punctured due to the transition between polymer chain alignment and the stretching of interatomic bonds. This second deformation regime is more linear and is often the stiffness of interest. If the initial stiffness or average stiffness is needed, the macro can be changed accordingly.
There is a Texture Analysis test for virtually any physical property. Contact Stable Micro Systems today to learn more about our full range of solutions.
For more information on how to measure texture, please visit the Texture Analysis Properties section on our website.
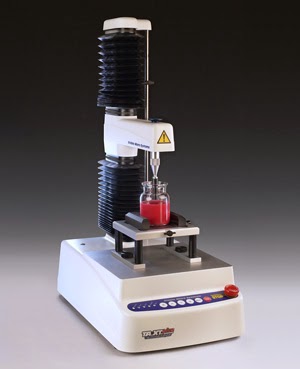
 The TA.XTplus texture analyser is part of a family of texture analysis instruments and equipment from Stable Micro Systems. An extensive portfolio of specialist attachments is
available to measure and analyse the textural properties of a huge range of
food products. Our technical experts
can also custom design instrument fixtures according to individual
specifications.
The TA.XTplus texture analyser is part of a family of texture analysis instruments and equipment from Stable Micro Systems. An extensive portfolio of specialist attachments is
available to measure and analyse the textural properties of a huge range of
food products. Our technical experts
can also custom design instrument fixtures according to individual
specifications.No-one understands texture analysis like we do!
To discuss your specific test requirements click here...
 |  |  |


No comments:
Post a Comment