Compression or penetration
When testing the hardness of thin products by compression or penetration, the measured force may show a sudden exponential increase as shown in the graph below. This occurs as a result of the probe moving nearer to the base.
Either the test will abort because the load cell has overloaded, or the test will finish, collecting irrelevant data that does not reflect the true properties of the product. Comparison could then incorrectly be made between maximum forces that are not sample derived.
When this occurs, the problem can be solved by reducing the distance of the compression or penetration test. Alternatively, the method can be replaced with a puncture test. The holed plate of the film support rig enables puncture testing using a probe up to 10mm in diameter. Finally, the use of a button trigger can be helpful.
Using the Button Trigger Correctly
When using a button trigger, tests are performed to the same distances of compression with respect to the surface you have calibrated the probe against.
Firstly, the probe height must be calibrated against the base of the test platform (that may be the instrument bed, a heavy duty platform or another type of fixture). Return the probe to a suitable starting point for the test; the starting point of the test must remain the same each time. Save this position by clicking on TA > Move Probe > Mem. > Setup.
When deciding on a distance (A), choose a length smaller than that between the base and the starting position (B), which ensures that the probe will not overload by contacting the base.
The use of a button trigger avoids any possibility of overloading in this way as the distance from the probe to the base is always controlled.
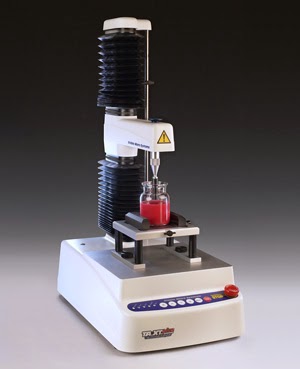
We can design and manufacture probes or fixtures for the TA.XTplus texture analyser that are bespoke to your sample and its specific measurement.
Once your measurement is performed, our expertise in its graphical interpretation is unparalleled. Not only can we develop the most suitable and accurate method for the testing of your sample, but we can also prepare analysis procedures that obtain the desired parameters from your curve and drop them into a spreadsheet or report designed around your requirements.
For more information on how to measure texture, please visit the Texture Analysis Properties section on our website.
 The TA.XTplus texture analyser is part of a family of texture analysis instruments and equipment from Stable Micro Systems. An extensive portfolio of specialist attachments is
available to measure and analyse the textural properties of a huge range of
food products. Our technical experts
can also custom design instrument fixtures according to individual
specifications.
The TA.XTplus texture analyser is part of a family of texture analysis instruments and equipment from Stable Micro Systems. An extensive portfolio of specialist attachments is
available to measure and analyse the textural properties of a huge range of
food products. Our technical experts
can also custom design instrument fixtures according to individual
specifications.No-one understands texture analysis like we do!
To discuss your specific test requirements click here...
 |  |  |


No comments:
Post a Comment